發表文章

目前顯示的是 6月, 2017的文章

H.264/H.265 Spec相關筆記

H.264 Spec 7.3.1 NAL unit syntax 7.3.2 RBSP payloads and RBSP trailing bit syntax SPS => 7.3.2.1.1 Sequence parameter set data syntax   profile_idc   level_idc   seq_parameter_set_id   chroma_format_idc   separate_colour_plane_flag   bit_depth_luma_minus8   bit_depth_chroma_minus8   pic_width_in_mbs_minus1   pic_height_in_map_units_minus1 PPS => 7.3.2.2 Picture parameter set RBSP syntax   pic_parameter_set_id   seq_parameter_set_id   num_slice_groups_minus1 Table 7-1 – NAL unit type codes, syntax element categories, and NAL unit type classes 讀取bit stream的函數定義在7.2中介紹 7.2 Specification of syntax functions, categories, and descriptors 關於ue(v), me(v), se(v), te(v)在9.1多作解釋 9.1 Parsing process for Exp-Golomb codes NALU/RBSP/SODB http://yumichan.net/video-processing/video-compression/introduction-to-h264-nal-unit/ http://yumichan.net/video-processing/video-compression/introduction-to-h264-2-sodb-vs-rbsp-vs-ebsp/ http://blog.csdn.net/stpeace/article/detai
用ffmpeg解出影片yuv像素資料

先用ffprobe查看一下媒體資訊, 確定使用解出來的像素類型是yuv420或是yuv420p ffprobe -i fhd_h264_video.mp4 Program 1      Stream #0:0[0x1023]: Video: h264 (High) ([27][0][0][0] / 0x001B), yuv420p(tv, bt709, top first), 1920x1080 [SAR 1:1 DAR 16:9], 29.97 fps, 59.94 tbr, 90k tbn, 59.94 tbc 上面就是我輸入的影片(fhd_h264_video.mp4)的執行結果,該影片用h.264的High profile設定,像素資料是yuv420p,解析度是1920x1080,30fps(29.97),另外SAR和DAR的解釋可以參考 這篇 依照影片資訊我們想解出最適合YUV檔案 ffmpeg -i fhd_h264_video.mp4 -t 10 -pix_fmt yuv420p -y output.yuv -t 10是指定只要取10秒的資料; 如果要指定起始時間, 需要用-ss {秒數}來指定 -pix_fmt yuv420p 就是解壓縮出來的yuv像素資料 -y 是如果輸出得檔案已經存在就覆蓋掉 Full HD解出來的yuv像素資料大小,應該是1920x1080解析度 x 每秒30張 x 10秒 x 每個yuv像素大小為1.5 bytes = 933120000 bytes 不過-t這參數的位置會影響運行結果,例如我寫在-i之前,最後會輸出304 frames,所以計算檔案大小的時候就需要,而寫在-i後面的話,最後會輸出300 frames。 更直接的方式就是用-frame指定處理張數100張 ffmpeg -i  fhd_h264_video.mp4  -frames 100 -pix_fmt yuv420p -y output.yuv  如果是要轉youtube上的4k超高畫質影片,媒體資訊印出來的可能會是yuv422p或者是yuv420p10le的像素資料,所以檔案大小的計算就會不同。以yuv420p10le, 3840x2160, 60 fps舉例: 3840x2160解析度 x 每秒60 張

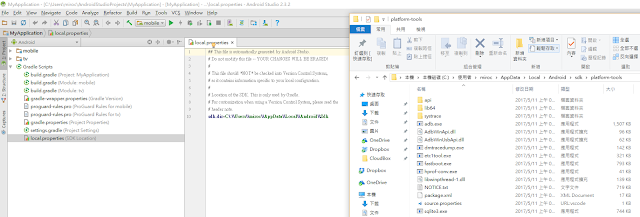
Android Studio 2的adb檔案位置

圖片
Windows上預設安裝在  C:\User\{你得的使用者名稱}\AppData\Local\Android\sdk\platform-tools

網路MTU測試

圖片
參考 tp-link官網上 的搜尋網路最佳MTU教學 1. Windows使用 ping {某個可以ping的網站} -f -l {要測試的封包大小} -f 是設定IP層的do not fragment旗標 -l 是設定ICMP的封包大小 像是我測試出來的封包大小可以到1472,再加上ip header大小28,就是我的網路最佳MTU設定1500(=1472+28) 看網路介面卡目前的MTU設定用 netsh interface ipv4 show interface 設定網路介面卡的MTU是用下面的指令 netsh interface ipv4 set subinterface {用上個指令看到的網路介面卡名稱,例如我的是"乙太網路"} mtu={上面測試出來的MTU值} store=persistent netsh指令請參考: http://www.james-tw.com/windows/windows-netsh-zhi-ling-cao-zuo 2. Linux上可用 ping {某個可以ping的網站} -s {要測試的封包大小} -M do -s是設定ICMP的封包大小 -M do一樣是設定do not fragment旗標 測試的封包大小也是一樣要加上28才是MTU最佳設定  看網路介面卡的設定則是用 ifconfig -a 或者是 ifconfig {你的介面卡名稱} 裡面就會有MTU的數值 設定網路介面卡的MTU值 ifconfig {你的介面卡名稱,例如eth0} mtu {上面測試出來的MTU數值} ifconfig指令請參考鳥哥網站 http://linux.vbird.org/linux_server/0140networkcommand.php

Python手寫檔案伺服器延伸內容

應用上一篇的 Python檔案伺服器 ,我們還可以寫一些不同的回應,像是.. 1. 回應Client端要求HTML檔案 def responseHtmlFile(hdl, path):     f = open(path, "rb")     fs = os.fstat(f.fileno())     hdl.send_response(200)     hdl.send_header("Content-type", "text/html; charset=UTF-8")     hdl.send_header("Content-Length", str(fs[6]))     hdl.send_header("Last-Modified", hdl.date_time_string(fs.st_mtime))     hdl.end_headers()     shutil.copyfileobj(f, hdl.wfile)     f.close()     del f 用法: responseHtmlFile(hdl, '/home/user/your_html_file.htm') 2. 回應Client端,要求轉址到另一個目標位置 def responseHttpRedirect(hdl, target):     hdl.send_response(301)     hdl.send_header("Location", target)     hdl.end_headers() 用法: responseHttpRedirect(hdl, 'http://www.google.com') 3. 把Client的request資訊parse後再回應給Client def responseGetRequest(hdl):     parsed = urlparse(hdl.path)     hdl.send_response(200)     hdl.send_header("Content-type", "tex

Ubuntu多網路界面route設定

像是我電腦有兩個ethernet和一個wifi界面,就很需要設定多界面route 參考IP address的一些資訊 https://en.wikipedia.org/wiki/IP_address Private network有三個網段可用 第一個10.0.0.0/8 從10.0.0.0 到10.255.255.255 第二個172.16.0.0/12 從172.16.0.0 到 172.31.255.255 第三個192.168.0.0/16 從 192.168.0.0 到 192.168.255.255 一般分享器都是用第三個網段,我就是透過wifi連接Internet的,所以預設gateway就設定給wlan0,讓所有連線預設連Internet。 實驗時需要測試廣播封包,廣播封包用的IP網段是從 224.0.0.0 到 239.255.255.255,而為了方便觀察行為是用eth1作為實驗用網域,為了增加查網路封包的方便性,所以我決定三個界面都用不同的網段,廣播封包的介面卡IP用10.0.1.100。而最後是eth0的IP用172.16.1.100連接到我自己使用,不會對外連線的git server 172.16.1.101,所以我設定多接面的網路route 就會像下面這樣 #清除所有route的規則 sudo ip route flush table main 使用route指令設定路由 # eth1 for experiments sudo route add -net 224.0.0.0 netmask 240.0.0.0 metric 1 dev eth1 # eth0 for private git server sudo route add -net 172.16.0.0 netmask 255.240.0.0 metric 1 dev eth0 # 預設gateway,讓不是上面條件的都走wifi界面跑internet sudo route add default gw 192.168.1.1 # 顯示最後設定的結果 route -n 使用ip指令設定路由(2020-02-10加入) # eth1 for experiments sudo ip route add 224.0.0